
- This topic has 10 replies, 4 voices, and was last updated 5 years, 2 months ago by
 Francisco sevilla.
- AuthorPosts
- February 4, 2017 at 11:27 pm #3492

 Bullitt RSParticipant
Hi Guys,
My name is Ryan, I’m 29 years old and I live in Holland.
Last year I stumbled on this site because I was looking for RC tractors. I was just looking around a bit and because of this site I wanted to start building one myself.
I bought all the parts and everything else I needed (circuitboards etc.). It’s a complete new start for me because I’ve never done something like this. I’m smart enought to pull it off but I had no idea where to begin and what I needed. But thanks to The RC Tractor Guy I know were to start.But when I collected everything I had a no time due to some circumstances. But now, almost a year later I finally started.
What I’ve done so far:
I’ve build the Tamiya and placed it inside the tractor.
I’ve also placed the servo for the steering.I’m not going to do the servo for the back linkage just yet. Want to be able to drive and steer the tractor first.
But I’ve noticed you’ve changed some things since you’ve started. Off course it will be improvements but it makes it a little bit more difficult to follow your video’s and build from there.
For example you’ve changed the Xbee for the NRF24 module. I’ve also chosen for the NRF24 but in your video of the circuit diagram you use the Xbee and this is where I got stuck.
In your video of the circuit diagram, when wiring the motordriver to the arduino. You talk about wiring pin 7 on the arduino to the motordriver. But on you Schematic it seems that pin 7 of the arduino goes to the steering servo. The same goes for pin 8. But in the video you wire it to the motordriver. I can’t really see on which pin of the motordriver you wire them. So I got stuck here because I wasn’t sure what to do. Should I follow the schematic which says Arduino pin 7=D7 goes to steering servo yellow wire which is also d7.
Or am I understandig this incorrectly?And the other part where I got stuck. The pins of the NRF24 module are very close together so I can’t use it in the board you are using for the circuit diagram. But I can understand this is really needed for testing.
I hope it is not to much trouble to help me out.
Thank you and I will post some photos as soon as I have some.
February 11, 2017 at 7:38 pm #3498 RC Tractor GuyKeymaster
Hi Ryan,
Trust me I know all about getting these things started and then loosing time to finish them 🙂
To be honest, I’m not 100% sure what way I did it now. I have two 9560Rs and I think for some reason I wired them differently but anyway I just check the sketch in the library and matches the wiring here: http://rctractorguy.com/rc-tractors-and-attachments/rc-tractor-builds/rc-john-deere-9560r
You can tell by reading this line: RCTractor JD9560R(5, A1, A2, 0, 0, 0, 7, 8, 0, 2, 4, 3, 6, A0, 0, 0, 0);
The 5 is the motor pwm, A1 and A2 are the direction controls.
The three zeros would be controls for a second motor if you were using them.
The 7 is the steering servo, 8 is the rear servo and the next zero would be for a front servo if you used it.
The 2 is the left indicator, the 4 is the right indicator.
The 3 is the headlights, the 6 is the tail lights, the A0 is the work lights and the next zero is another light function.
The final two zeros are for beacons.If you follow the wiring at the bottom of that page and use the code in the library it should just work for you.
Does that make it a little easier to understand?
February 18, 2017 at 8:45 pm #3519Bullitt RSParticipantYes thanks for clearing that up !
But I’ve ran into another problem.
When I try to validate or upload your code in the arduino program I get an error.
I tried the arduino program on 2 computers and both give the same error. I tried download different versions of your code but still the same error.
I assume I have to use the JD9560R.ino file?
When I do this is the error I get:
C:\Users\Ryan\Downloads\RCTractorGuy\RCTractorGuy\examples\RC Tractors\JD9560R\JD9560R.ino:19:17: fatal error: I2C.h: No such file or directory
#include <I2C.h>
^
compilation terminated.
exit status 1
Fout bij het compileren van board Arduino Pro or Pro MiniSo I thought maybe I should add the files from the main directoy. When I do I get a different error:
sketch\RCTractorGuy.cpp:11:29: fatal error: RCTractorGuyI2C.h: No such file or directory
#include <RCTractorGuyI2C.h>
^
compilation terminated.
exit status 1
Fout bij het compileren van board Arduino Pro or Pro MiniHave you ever occurred this error?
I’m not doubting your code. But I wonder what goes wrong. Am I using the wrong program: Arduino 1.8.1.
I use Windows 7 could that be the problem?This really got me stuck because I can’t test if everything works.
Thanks for your help !
PS: I tried other codes to of your file. I get the same sort of errors on every code I try to validate. So it must be something on my side. Maybe I need an older versions of the Arduino Program?
- This reply was modified 7 years, 2 months ago by Bullitt RS.
February 19, 2017 at 12:00 pm #3521RC Tractor GuyKeymasterI don’t think you have installed the library correctly, I see in the post above you have the following:
C:\Users\Ryan\Downloads\RCTractorGuy\RCTractorGuy\examples\RC Tractors\JD9560R\JD9560R.ino
which suggests to me that the files are still in your downloads folder and I’m pretty sure thats why the IDE can’t find them. I think you just need to install the library, here is the guide https://www.arduino.cc/en/Guide/Libraries#toc4. I usually do the manual installation but maybe the import zip option would work too.
February 23, 2017 at 3:27 pm #3527Bullitt RSParticipantthank you ! I used the zip option and it worked fine.
I Succesfully oploaded the basiccontroller onto my arduino uno but I’m having problems with uploading to the Arduino Pro Mini and I can’t figure out how to solve it.
Did you had any problems with it?
I get the notification that the board is not giving any response when uploading. I’m sure I used thr right com port and selected the right board. When I select “get board info” get some info with these settings, if I change one setting then I don’t.
I bought an extra Arduino Pro Mini just to be sure it was not a broken board but the second one also doesn’t respond when uploading.
I tried several instructions from the internet how to install the drivers but nothing seems to work.
And I do think it is a driver problem. I think the computer has installed drivers for the cable but not for the Arduino.Did you had any problems with this or any idea how I can check or install the right drivers?
February 28, 2017 at 6:42 pm #3530RC Tractor GuyKeymasterIs it a new cable or have you used it before? If its new then maybe the wires aren’t in the correct order.
Another idea, do you have anything connected to the Arduino like a servo for example? That might be too much power for the FTDI cable to supply so you might need to power the circuit from a battery or other power source.
March 3, 2017 at 5:26 pm #3533Bullitt RSParticipantIt was a new cable. Like in your video I disconnected the red wire which should supply power because I was already supplying power from the battery.
But I also tried only the arduino and reconnect the red cable. The led turns on so it gets its power.Now I bought an usb adapter which has 6 pins which fit the arduino pro mini directly. But I notiec that the ports aren’t in the same order.
It also has an cable included but it only has 5 ports while the usb and the arduino have 6.
Which ports need to be connected?
GND
GND
VCC
TX0
RX1 (is named RXD on the usb adapter )
DTRAS I see the list of ports probably only one ground is enough but I’m not sure
March 5, 2017 at 2:49 am #3535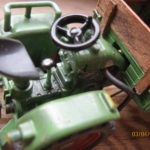 modelleicherParticipant
Hello,
Yes, one ground is enough. If the Arduino is supplied with its own power you don’t need to connect vcc.
TX on the arduino connects to RX (RXD) on the USB adapter.
RX on the arduino connects to TX (TXD) on the USB adapter.
DTR on the arduino connects to DTR on the USB adapter.RX to TX and TX to RX because TX -> transmitting and RX -> receiving, so the port the arduino is receiving from goes to the port the USB adapter is sending from and vice versa.
March 7, 2017 at 7:38 pm #3538Bullitt RSParticipantProbably something wrong with the cable and adapter i’ve used. Bought another sort adapter and finally, finnaly uploaded the code into the Arduino Pro Mini.
So as happy as I was, put my arduino on the breadboard (which was still wired following your circuit diagram of the site )
When I plug in my battery (don’t have a right on/off switch yet) I see the steering servo moving a for a sec. Light on the Arduino is on but I can’t control anything.
Also I don’t hear the humming sound I hear on your video when you’ve uploaded the code into your arduino. Everything is silent.I also have use your basic controller, upload to the arduino uno was succesfull the first time. I have tried to reset en reupload it and with succes.
But still no control. Tried rewiring everything, still nothing, tried the second arduino Pro mini and still nothing.
Can’t move forwards or backwards and can’t steer (haven’t installed any lightning yet.What could be my problem?
Would the NRF24l)1 modules be broken? Or both Arduino’s?
March 7, 2017 at 10:43 pm #3539modelleicherParticipantYou can upload the Blink Sketch to the Arduino to test if they are working..
I’ve had a hard time getting my NRF Modules to work the first time. But i didn’t use the RC Tractor Guy code. So not sure if it was software or hardware related.
Anyways, here is what I noticed:
– NRF24 needs stable power supply (9V battery appearantly doesn’t have enough current, so rather a few AA cells or lipo)
– it is good practice to solder a capacitor across 3.3V and GND on the NRF24 module (at least 100µF I would say) although it seems to work fine without for many people
– some jumper cables are terrible at making a good connection, so for stable communication to the NRF24 make sure the wires have good contact and as less possible failure points (connections) as possibleAlso, if you are not using an external voltage regulator make sure the Arduino is a true 3.3V arduino. Otherwise wiring the whole thing like in the circuit diagram will result in 5V to the NRF module which very likely will destroy it.
February 27, 2019 at 6:39 pm #3637Francisco sevillaParticipantHi Guys,
My name is Francisco, I’m 66 years old and I live in Spain
I’ve been looking for something since,
I build trucks and trailers scale 1 / 14.50-Tamiya and 1/16 Wedico
But I always have problems for the lights issue and here I think I’ll solve it
Well I see many projects for my hobby, the tried several codes and it works me half
I have a problem (I am working with Arduino one V3 with Shield joystick V1 and Arduino Nano)
It only worksBasic Arduino Controller Code Version 1.0
Tractor Rc JD9560R Cab Code Version 2.0D2 Right Indicator, D3 Front Work Lights, D4 Right Beacon, D5 Rear Work Lights
D7 Left Beacon, D9 Left Indicator, A0 Head Lights
The TX and RX have not been tested yet:
Can you help me
Thanks greetings
P.S. Sorry it’s the first time, I do not know if it’s right where I write - This reply was modified 7 years, 2 months ago by
- AuthorPosts
You must be logged in to reply to this topic.