
In our very first mailbag video we received a simple two axis joystick module sent to us by IC Station. This is an ideal addition to have in your spares box ready for when you want to quickly build a test rig for something be it an RC Tractor, RC helicopter or some kind of robot.
IC Station liked our reviews and have given us a discount code.
Details of the Coupon Code:
(Coupon Code can be used for all items, except the on sale ones.)
Coupon Code: icsois
Discount Amount: 10%
Max Use: 1
No Min Order
Started Date: 8th July, 2014
Ended Date: 9th October, 2014
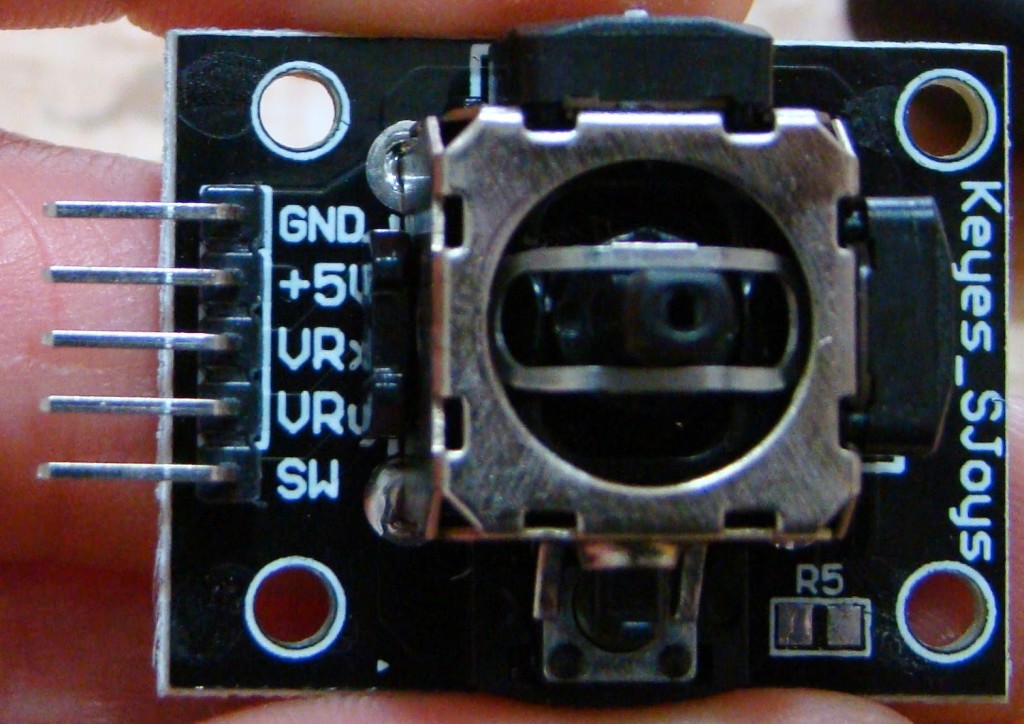
The joystick is mounted on a nice black PCB with clear white lettering labeling the interface pins which are GND for ground, +5V for the positive 5 volt rail, VRx for the output from the x axis variable resistor, VRy for the output from the y axis variable resistor and SW for the output from the switch.
The joystick has a 10k Ohm variable resistor on each axis which is adjusted as the lever moves. Each variable resistor has three pins, the first is connected to ground, the middle pin is the output and the final pin is connected to +5V. This creates two variable voltage dividers governed by Vout = Vin*(R2/(R1+R2)) where R1 and R2 are the values of the two halves of the variable resistor. The result is an output voltage which varies in relation to the joystick position. This voltage can then be read using the analogue input of a microcontroller and this information used to control your device.
The joystick module also has a switch which is activated by pushing down on the joystick. This switch connects the SW output to ground when depressed which means that is must be used in a normally high switch configuration as shown in the image.
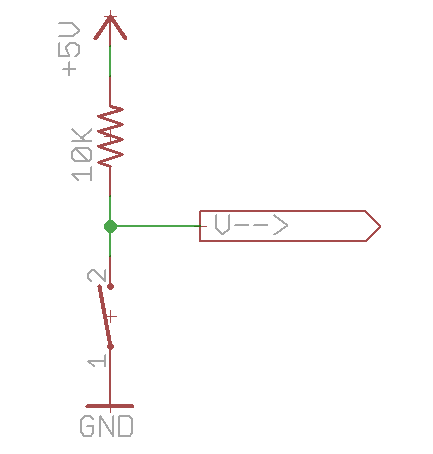
The module does not include the pull up resistor so you will need to ensure you add this. It may be possible to enable internal pull up resistors on your microcontroller which would mean you avoid needing to add the external resistor. This should be possible on an arduino as discussed on the Arduino website here.
The example I used at the end of the video to demonstrate the joystick controls my RC Scania R620 model. The code I used was as follows:
Any suggestions on how to improve the code would be very much appreciated, I am definitely no Arduino or C expert so any suggestions would be great.
If you have any comments on the blog, the videos or the website please let us know over on the RC Tractors Forum as we are still trying to build a decent community.
hi,where is the code for the tractor?